Watermelon and Cucumbers with Spicy Sumac Salt by Alison Roman

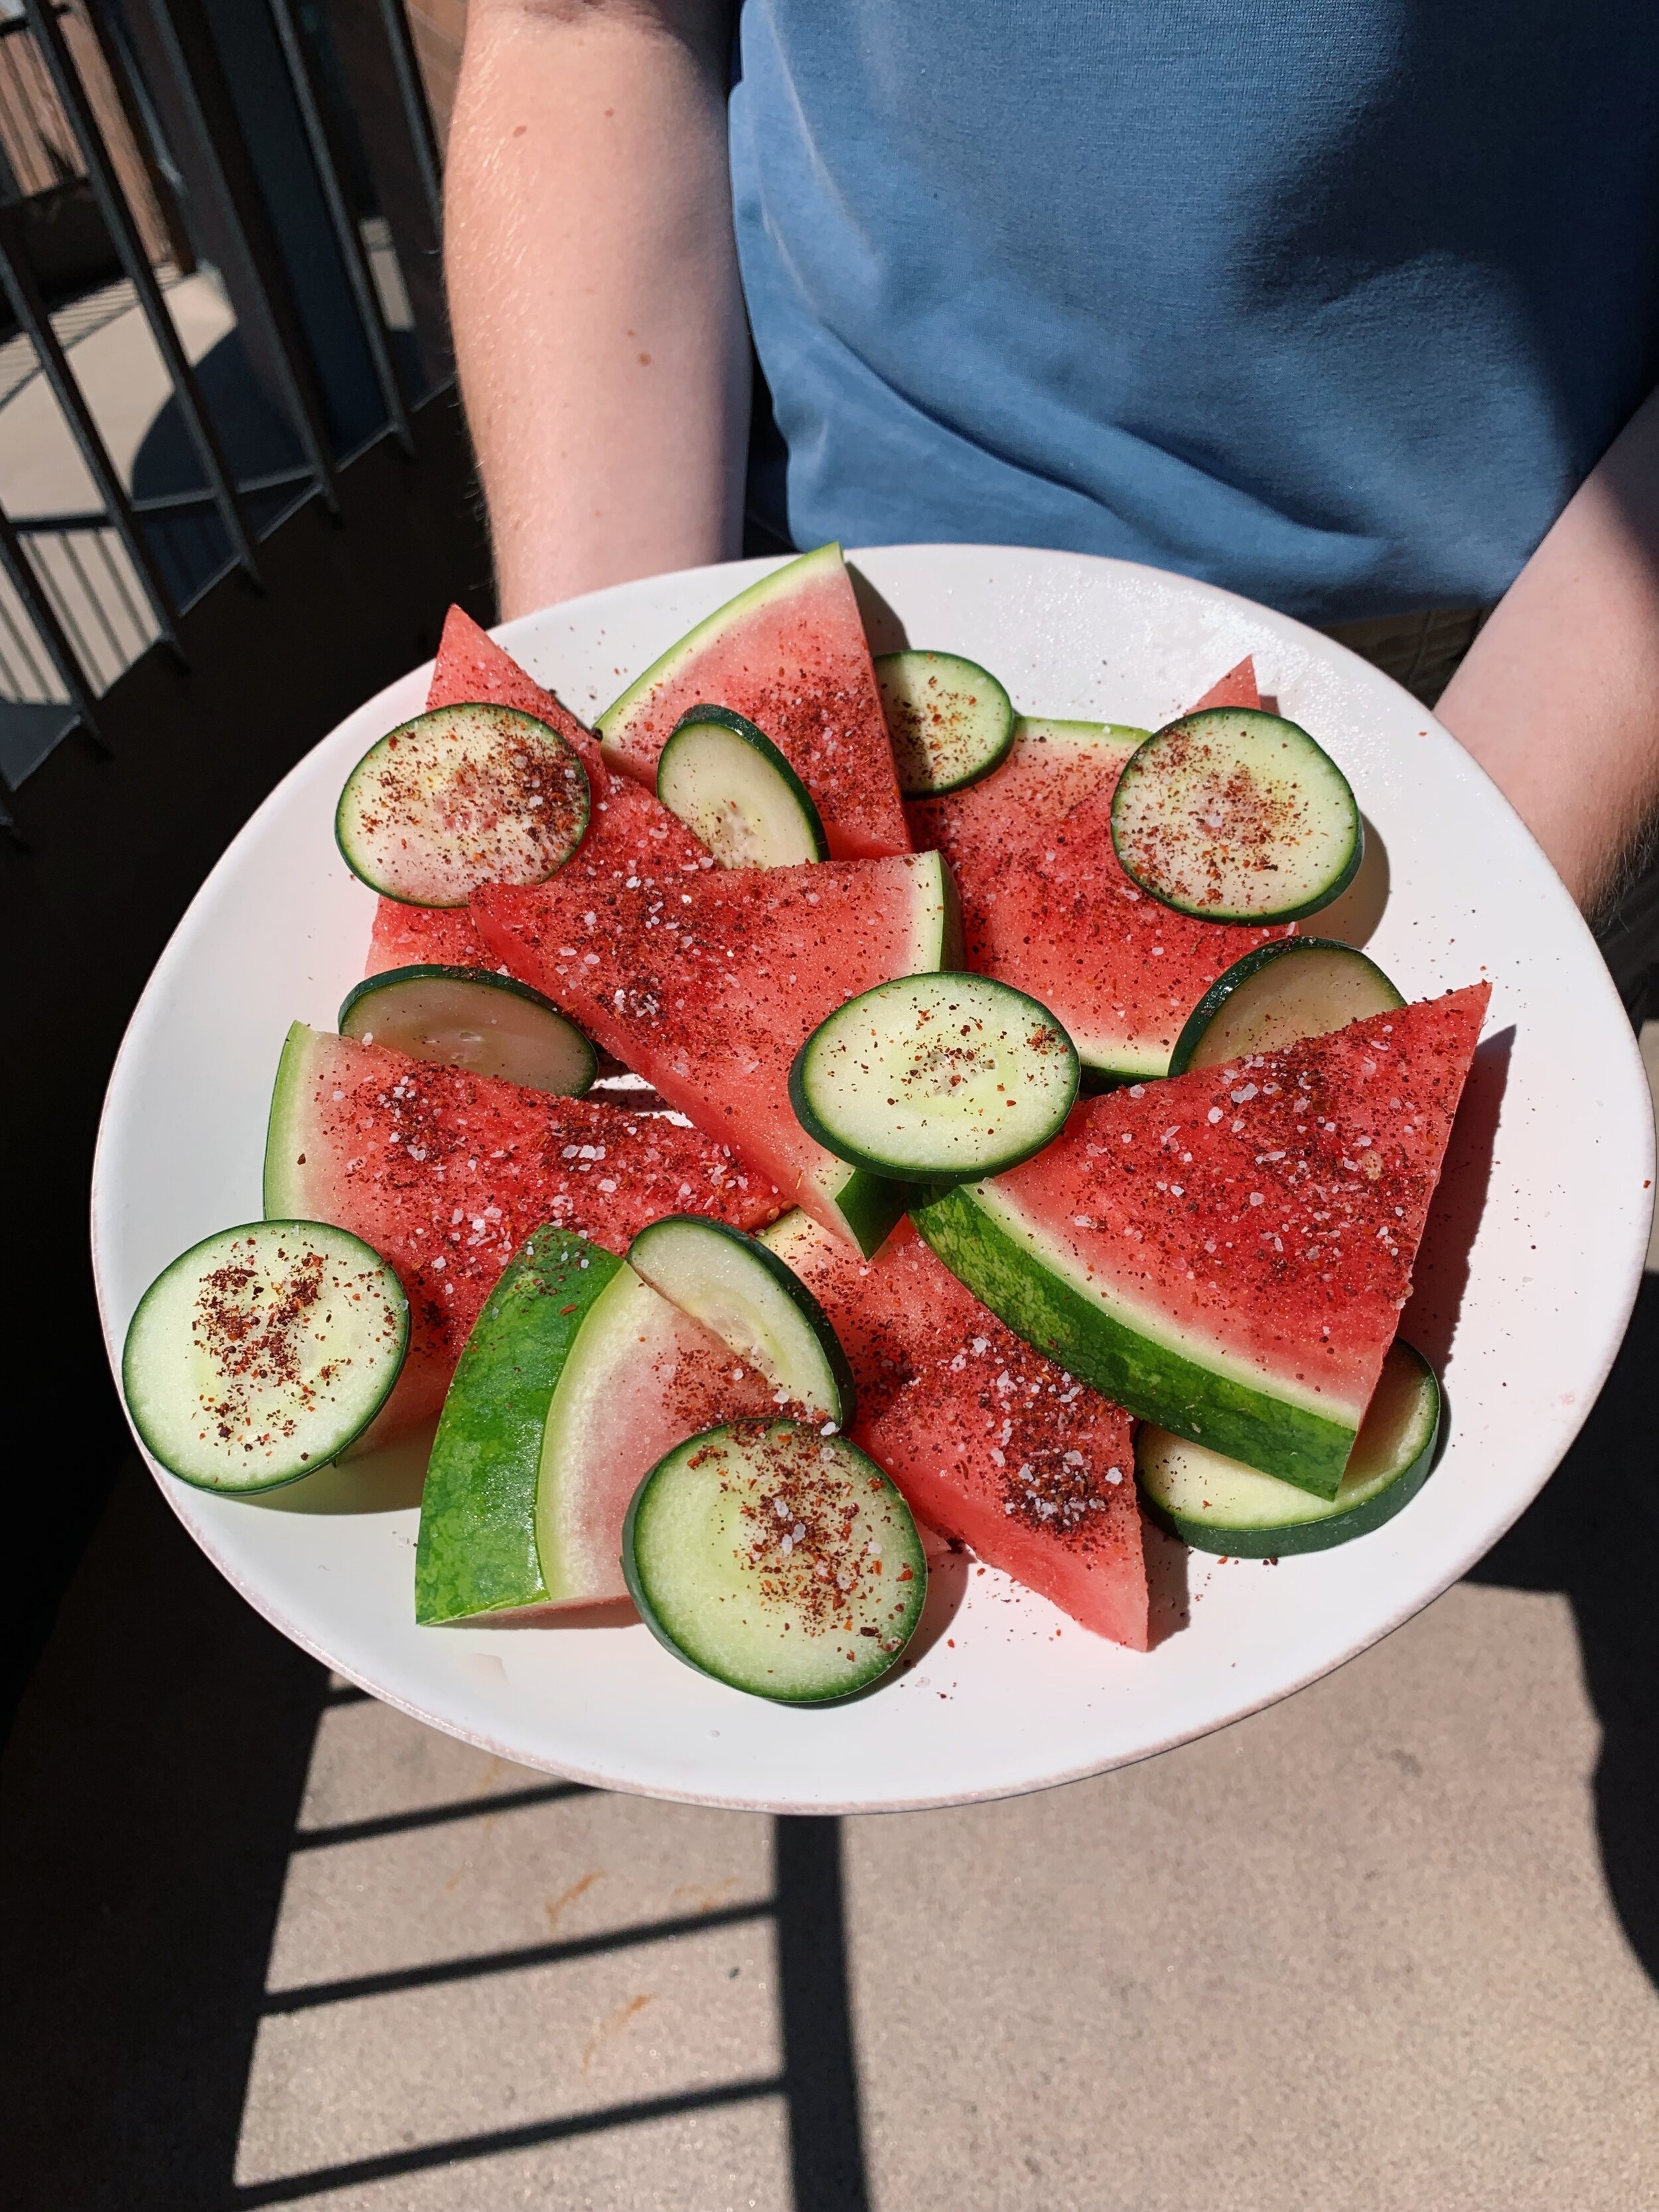
Ever had watermelon with tajin? If your answer is no, then you are really MISSING OUT! This recipe is Alison’s version of that powerhouse combo, and I am HERE for it. 

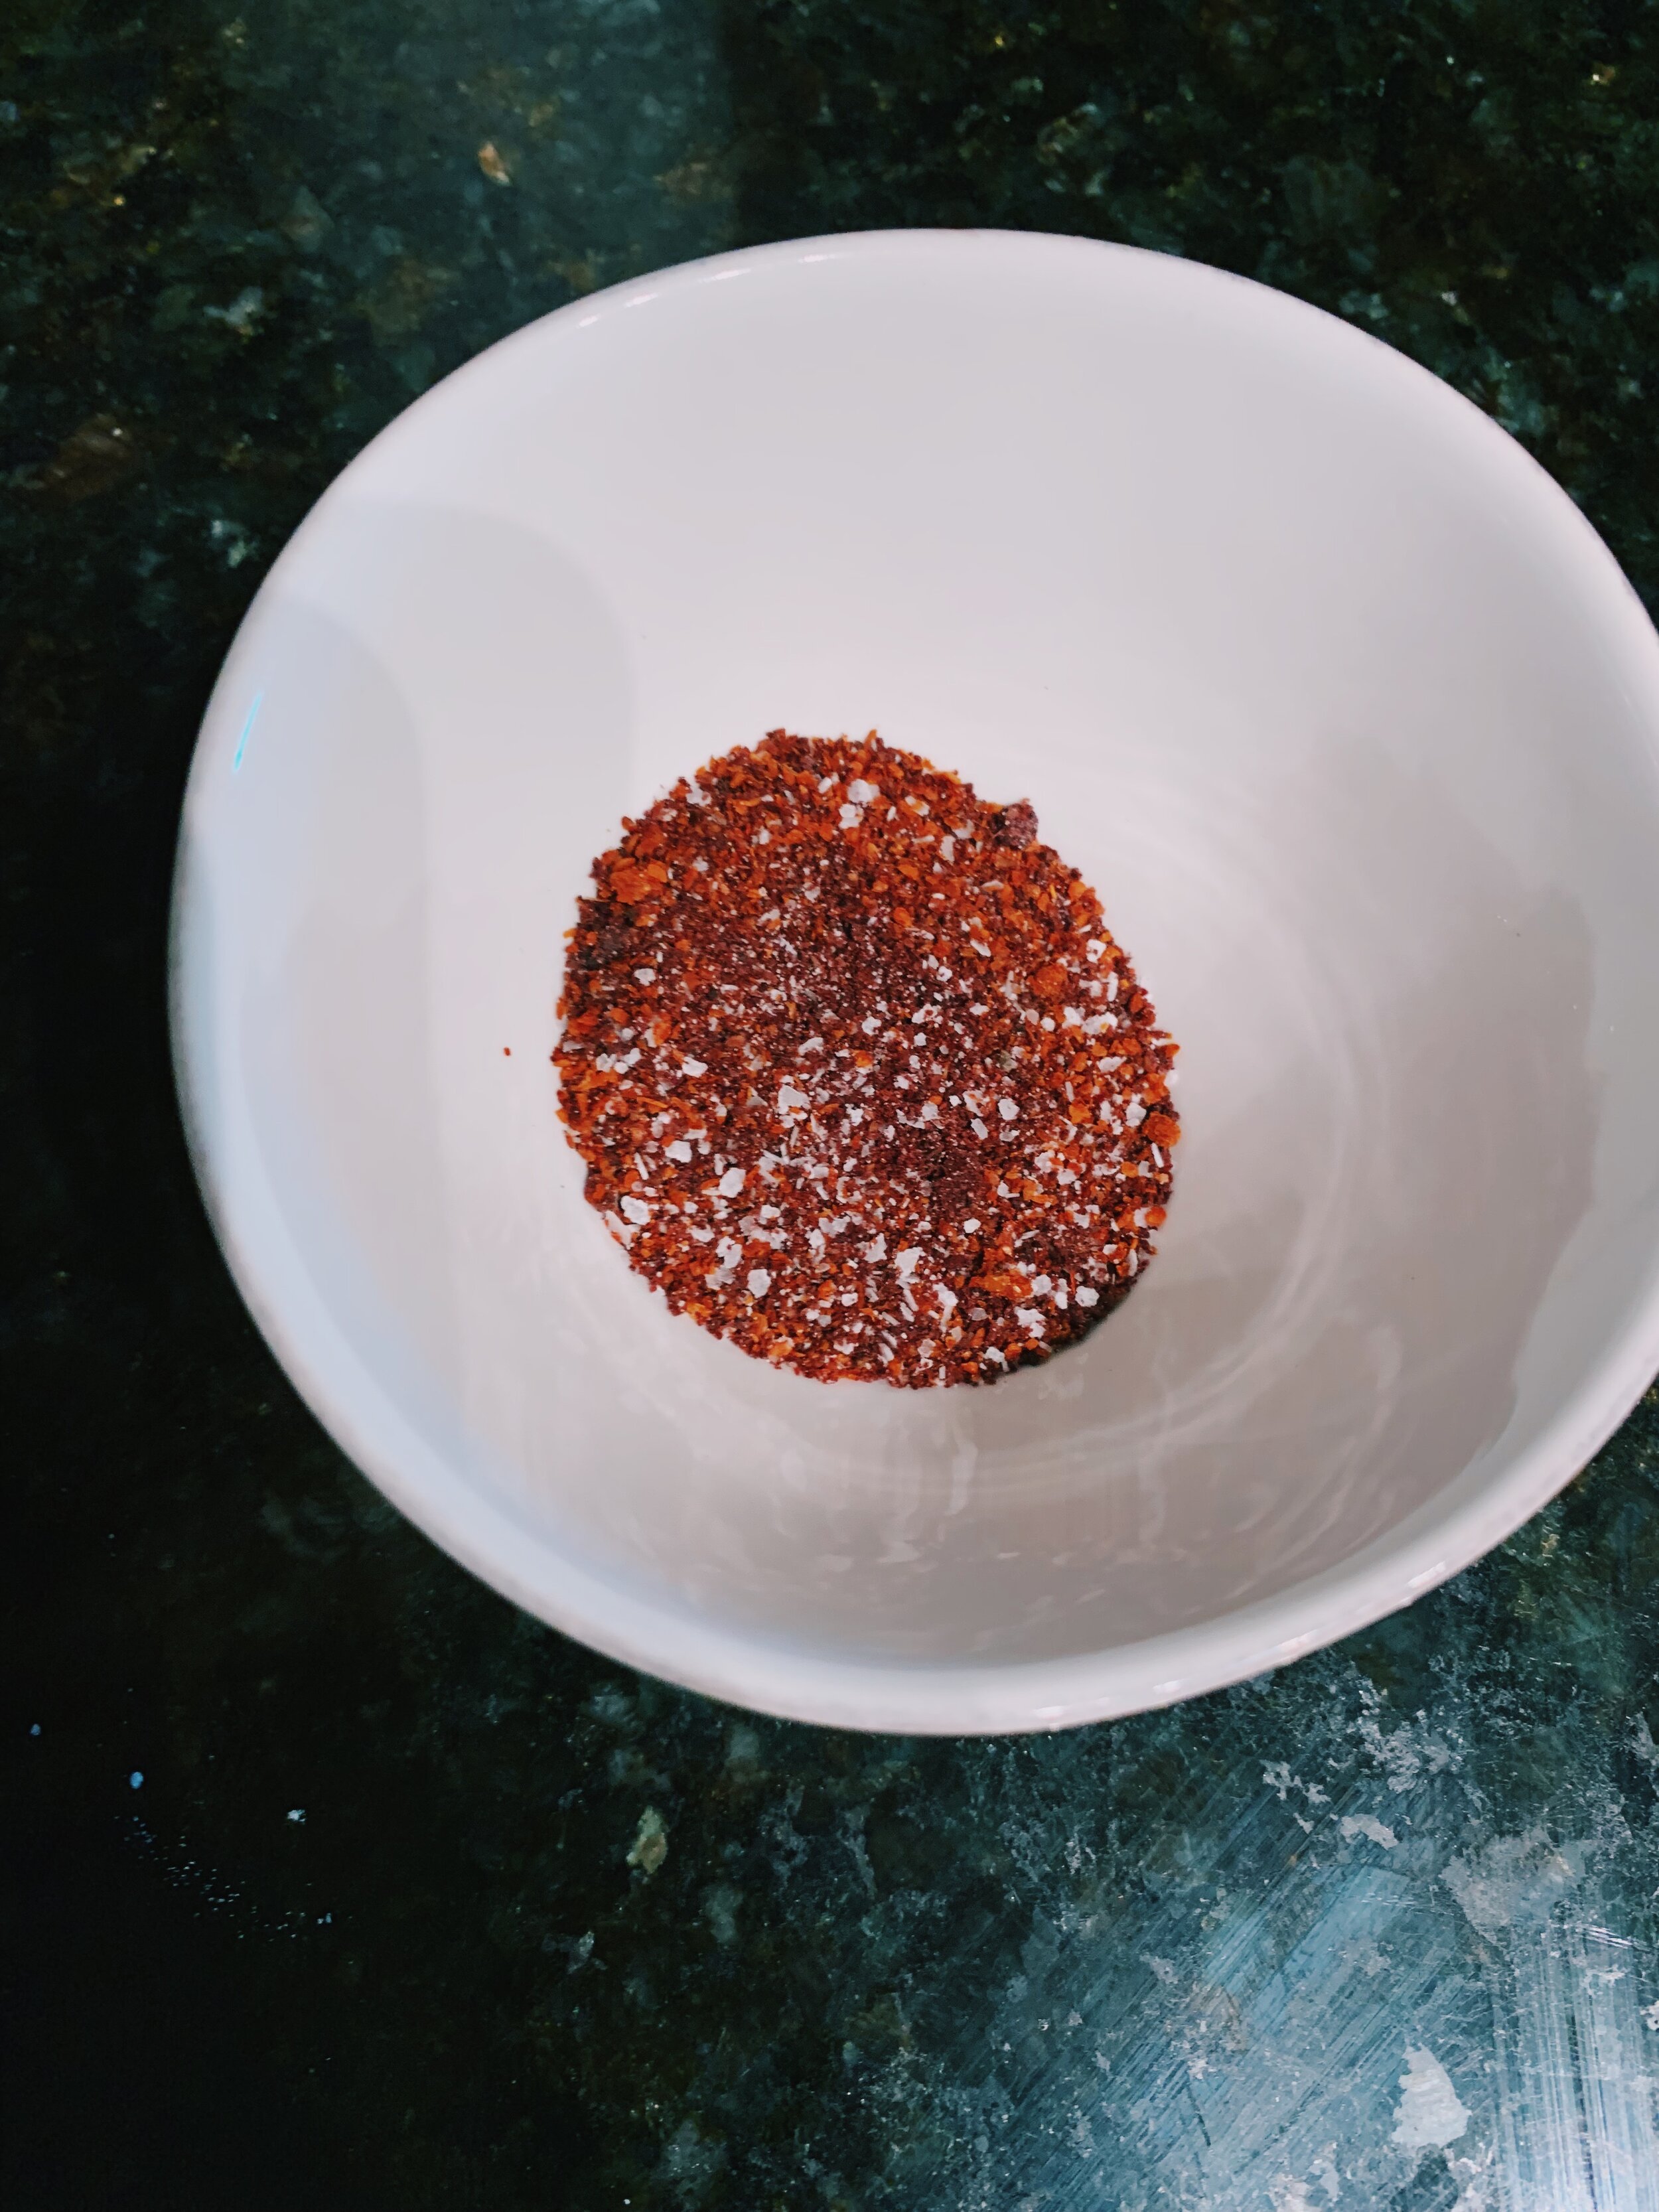
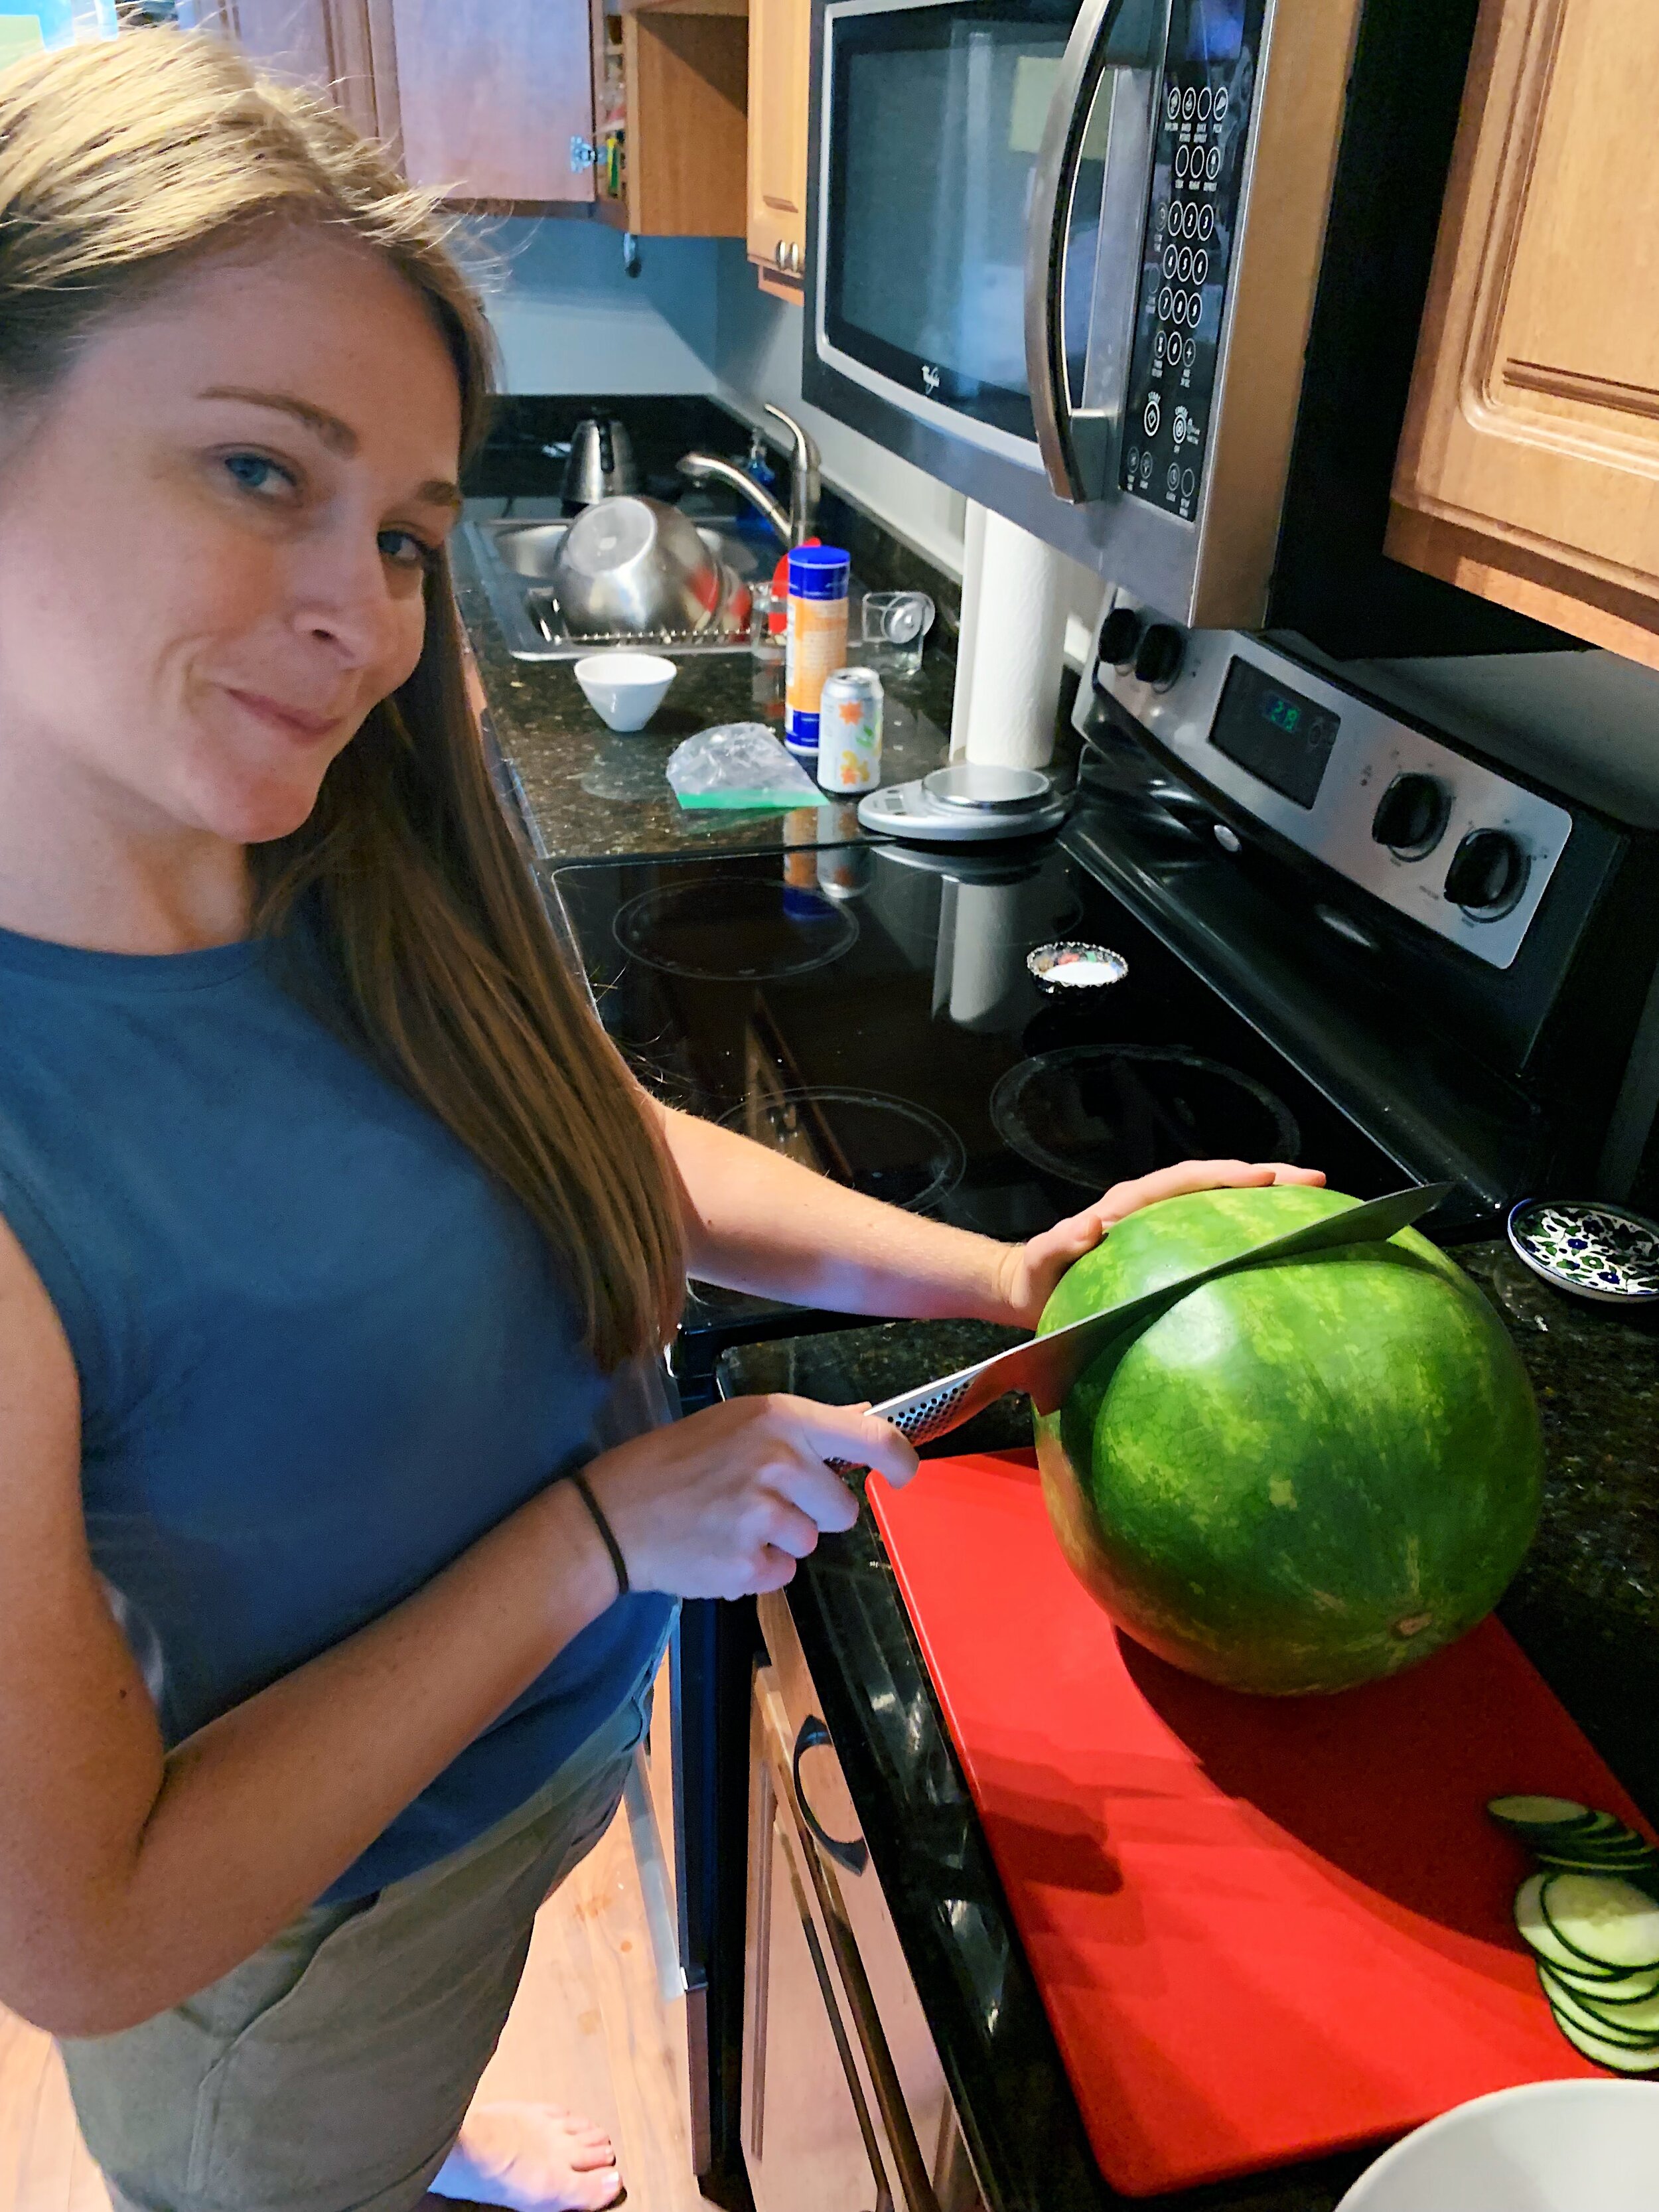
It’s simple. Sumac provides the sourness. Aleppo pepper provides the spice and heat. Coarse kosher salt provides… the salt. Artfully arrange a place of watermelon and cucumber slices (or don’t make it pretty, that’s fine too), and sprinkle a mixture of these spices over the plate. What results is a sweet, sour, spicy, salty snack, perfect for a crowd or just you and a friend. 

Margaret and I ate two full plates, along with salted potato chips and ginger sparkling water from Whole Foods (so good!). It was the perfect summer lunch on my balcony. 

92 recipes cooked, 133 to go.

Charred Corn and Scallions with Tomatillos by Alison Roman

Grilling recipe number 2! If you want to know more about the actual grill experience, feel free to check out yesterday’s post about Grilled Carrots with Limey Hot Sauce and Cotija

There are several components to prep for this dish, including tomatillos, which I’ve yet to talk about on the blog. For those of you who are unfamiliar, tomatillos are small green fruits that resemble a smaller tomato in shape, and come wrapped in a sticky husk. Tomatillos are not spicy, but rather tangy, acidic, and bright. They’re frequently used to make green salsas. I also love making homemade enchilada sauce with them. I roast the tomatillos and several jalapeños under the broiler before blending them up with salt and pepper. Delicious!

This recipe only needs a few tomatillos (they’re sold by the pound.) They’re thinly sliced and tossed with lime juice, cilantro, salt and pepper, and set aside to await the corn and scallions.  

The recipe calls for either scallions or spring onions. And since I happened to find some spring onions (which are rare these days!), I used those. Two of the raw onions are saved for chopping and tossing with the tomatillos. The rest of the bunch get charred over the grill — which takes only a few minutes. 

The corn grills on medium-high for 8 to 10 minutes according to the recipe. However, similar to the grilled carrots, they could have used another 5-8 minutes to get more char. As long as they aren’t totally blackened, I say the more char, the better. 

Once ready, cut the corn off the cob, roughly chop the grilled spring onions, and mix both with the tomatillo mixture. Per Alison’s note, we added diced avocado — to which I also say, the more avocado, the more delicious. (Alison claims that avocado “does nothing for her,” but I couldn’t disagree more. See this post for a deeper dive into my feelings about avocados.) 

This dish lends itself very well to modification! Margaret pointed out that plenty of alterations could be made based on preference. Add sliced jalapeño or flaky salt, diced fresh bell pepper, or cotija, just to name a few. 

We loved this dish, and it made enough for 6 of us to each have seconds (and for some, thirds). 

91 recipes cooked, 134 to go.

my sweet pal Margaret

my sweet pal Margaret

Grilled Carrots with Limey Hot Sauce and Cotija by Alison Roman

It’s summer, friends! Which means grilling season! Which means of course I had to make a list of all of Alison’s recipes that require (or strongly suggest) using a grill. My in-law’s live about 15 minutes away, and have both gas and charcoal grills. I plan to utilize these grills for all of the grill recipes until we move to Chicago in September. 

grilled-carrots-limey-hot-sauce-cotija-alison-roman-grill.jpg

I find it necessary to disclose that I’ve never grilled before. I still haven’t. I asked my father-in-law to monitor these carrots while I prepped the rest of the meal. That said, I intend to be more hands-on in the future! 

To prep these delicious carrots, I simply tossed them in oil and salt and pepper before plopping them directly on the grill. The grill is set to medium-high, and Alison says the char should happen in 8-10 minutes. We took the carrots off at 10 minutes, but I must admit that they could have spent another 5 and gotten even softer, charred and more delicious. Margaret agreed. 

charred-corn-scallions-tomatillos-alison-roman-3.jpg

That’s right, Margaret! Margaret, more than anyone else in my life, has taught me how to cook. She’s also one of my best friends. She and I cooked this recipe together, and it was such a treat. 

Once grilled, the carrots are tossed in a “limey hot sauce” which is really just a mixture of lots of lime juice, honey garlic and minced jalapeño. It’s not a marinade, it’s a sauce. A very thin liquid sauce with chunks of minced jalapeño. It’s really good, and the leftovers were passed around the table for more drizzling on truly everything on our plates — Alison’s charred corn and some grilled chicken. 

The final element is cotija cheese. We crumbled far more than the recipe calls for on top of the carrots. Margaret would have liked for a better way for the getting the cotija to adhere to the carrots. It tended to fall off once plated, which meant scooping up cheese crumbles with your fork after each bite of carrot. Doable, but not ideal, nor elegant. Although, can you eat carrots elegantly? I’m unsure. 

Overall, these carrots are a fun summer night dish that most definitely will appear again in meals to come. 

90 recipes cooked, 135 to go.

grilled-carrots-limey-hot-sauce-cotija-alison-roman-3.jpg

Upside-Down Apricot Tart by Alison Roman

I love when a dessert makes me look a more skilled baker than I really am. Puff pastry will do that for you. It’s a store-bought, frozen sheet of thinly layered pastry dough. Painstakingly simple to use, but boy, does it look sophisticated. Puff pastry covers the bottom of this tart. The other side is half-cut apricots covering the bottom of a cake pan filled with a simple honey caramel. Looks like a mosaic, but requires far less finesse. 

I started by prepping the apricots, cutting them in half length-wise, so they were ready to place in the caramel as soon as it was ready. Alison says to use “1lb. apricots (5-6 apricots),” but I ended up needing about 1.15 lbs (10-12 apricots) to fill my cake pan. Alison must have access to really big apricots. 

The caramel made me a little nervous. I don’t have a ton of experience making it, so I’m not the best judge of color and viscosity. Thankfully, I was on the phone with my pal Margaret while I made it, and she coached me on what to look for. My caramel was taking longer than Alison’s instructions, but Margaret assured me that working towards the dark amber color is more important than the amount of time it takes to get there. Once the caramel seemed thick enough and gave off an amber hue, I poured it to cover the bottom of a 10-inch cake pan. You can use a 9-inch pan, too. 

I quickly placed the apricots, cut-side down, over the caramel. Then I loosely covered them in the puff pastry sheet. I trimmed the edges so it came up about an inch on the inside of the pan. According to Margaret, the key here is a loose draping of the pastry, as if it were a blanket and you were tucking the apricots in for a nap. Let the blanket lightly rest over the fruit. Tucking them in too tight will only make ‘em uncomfortable and want to burst out of bed. 

The pan bakes for about an hour total at two different temps – the higher one to bake the pastry, the lower one to bake the fruit. I made this tart a few hours ahead of serving so the caramel hardened in the pan before I could flip it over. To remedy, I stuck the pan back in the oven at 375 for 5 minutes. The caramel loosened and the tart became easy to flip onto a plate. I covered the top with toasted, chopped pistachios and served it on its own. Ice cream or whip cream would have done nicely, but I didn’t have the energy. Plus, the tart on its own is perfectly wonderful. 

Just a friendly reminder that June is apricot season. Trader Joe’s sells them by the pound for $3.29! If you’re planning to make this recipe too, may I suggest you make it in the next two weeks? 

Oh, and feel free to call me if you want to chat about the color of your caramel! 

86 recipes cooked, 139 to go.

Jen's Key Lime Pie by Alison Roman

Before you ask, I’ll answer. No, I don’t know this Jen - she’s apparently Alison’s cousin. I do, however, know a few of my own Jen’s, including one who is a dear friend. She lives in Spain and teaches theater and is a great dancer and has an infectious, fun-loving spirit. I miss her. But my Spain Jen didn’t inspire this recipe. Alison’s Jen did, which means that Jen must be pretty great, too. 

This pie was just delicious. The balance of sweet, sour, and slightly salty was absolutely lovely, and I can’t wait to make this again. The results were great, but about the process—I have questions! 

key-lime-pie-alison-roman-crust.jpg

Step one, making the graham cracker crust, is rather straightforward. I found GF graham crackers that honestly taste just like the Nabisco brand that I grew up with. Alison says she likes to break up the crackers into tiny crumbs with her hands. So I started doing that too. After having only gotten through half of the crackers in about 10 minutes, I decided to abandon the mission and settle for a food processor. Excellent choice, in my opinion. This went so much faster. The crumbs are then combined with melted butter, coconut oil, and a bit of sugar and salt. Press ‘em into the pie dish and bake for about 15 minutes. 

key-lime-pie-alison-roman-limes.jpg

The filling is where my questions lie. The ingredients and assembly seem to mirror other key lime pie recipes I’ve seen on the Internet. Just a lot of lime juice, zest, egg yolks and a can of sweetened condensed milk. And lots of whisking as each ingredient is added. Once it’s all light and fluffy, the mixture is poured into the crust and baked… 

Alison’s recipe instructs the pie to be baked at 350° for 20 to 25 minutes. She says, “the center should barely jiggle.” So at about 22 minutes, I administered my first Jiggle Test. And boy, did it jiggle. The liquid had become more solidified, but I witnessed a lot of movement. So I put it back in for another 4 minutes. Jiggle Test #2: still rather jiggly. I checked 3 MORE TIMES! The top of the filling began to form cracks, but the jiggle was still present. Finally, after about 35 minutes, I decided to remove the pie because the cracks were becoming too worrisome, and I didn’t want the egg yolk to curdle. 

key-lime-pie-alison-roman-filling.jpg

My questions are: How do I properly measure a pie jiggle? Are my jiggle standards too high? Is there a jiggle scale? Is Alison’s oven at 350° way hotter than my oven at 350°? 

In my search for answers, I compared this recipe with another NYT key lime pie recipe. This only left me more confused. The NYT recipe uses the same filling ingredients, and tells you to bake the filling at 325° for 10 to 15 minutes, “until the center is firm and dry to the touch.” If I had baked my pie at that temperature, it might have been 40 minutes by the time I reached that result! 

Alas, my Nancy Drew skills can only take me so far. If you or your loved one are experienced key lime pie bakers and have any leads on answers to my questions, please contact me by commenting on this post. Thank you in advance. 

Despite the filling confusion, the pie tasted excellent. The X factor for the whipped topping was adding in some yogurt after the heavy cream and sugar were fully whipped. This gave it a fresh, light, slightly sour taste that wonderfully complemented the other elements. 

We shared this pie with our dear friends, Madeline and Sam after an Alison-inspired dinner of Paprika-rubbed Chicken and Crispy Smashed Potatoes. Madeline brought excellent glazed carrots from The Food Lab, which I can’t wait to make myself.

31 recipes cooked, 194 to go.

key-lime-pie-alison-roman-plated.jpg