Coconut-Braised Chicken with Chickpeas and Lime by Alison Roman

I’ll admit I came to this recipe with a bit of healthy skepticism. An Indian-Korean fusion dish sounded nice in theory, but could gochujang and cumin really go well together? Thank goodness it’s in Alison we trust (at least when it comes to cooking). I didn’t have to taste this dish to know my doubts were laid to rest. I simply had to smell it… 

This recipe calls for a mix of bone-in, skin-on chicken parts. Instead of trying to cut up a whole chicken myself this time, I bought 1.7 pounds each of legs and breasts. Which turned out to be a good call. With so much rich coconut milk, a darker meat, like thighs, would have felt too heavy. The whiter meat soaked in the fatty coconut and strong spices nicely. But I’m getting ahead of myself… 

coconut-braised-chicken-chickpeas-lime-alison-roman-onion.jpg

The first twenty minutes were spent browning the chicken in my dutch oven, trying to render as much fat as possible. Sadly, much of the skin stuck to my pot, ripping off the skin as I took it out. I kept the heat at medium, like Alison says, and used canola oil too. Perhaps it’s my pot? Maybe the heat was still too high? 

With the chicken browned and the fat rendered, the chicken lies in waiting on a plate while garlic and onion spend time softening in the fat. Then joins the spice brigade: gochujang (Korean chili paste -- find this at Whole Foods or H-Mart), ginger (freshly grated), turmeric (I used the ground kind), cumin, and red pepper flakes. This is one powerful combination, and each spice is essential to the end result, adding dynamic heat, floral and earthy tones, and acidic tang (gochujang is fermented). The spices took no time at all to become fragrant. I added two cans of coconut milk next, along with chicken broth. I’ve recently taken after my pal Margaret and stopped buying cartons of chicken broth. Instead, I bought a Costco-sized jar of Better Than Bouillion and add one teaspoon at a time to boiling water before I start any recipe that requires chicken broth. It takes no time at all to make my own, plus it’s more fridge-space efficient and environmentally friendly! 

I submerged the chicken in the liquid, and sprinkled in a drained can of chickpeas. Now for the fun part: put on the lid and walk away. Forty-five minutes later, the smells of spice and coconut are frankly irresistible. But the stew needs more time. I removed the lid and let everything simmer for another half hour. You’ll know it’s ready when the chicken meat can practically fall off the bone with the smallest nudge. 

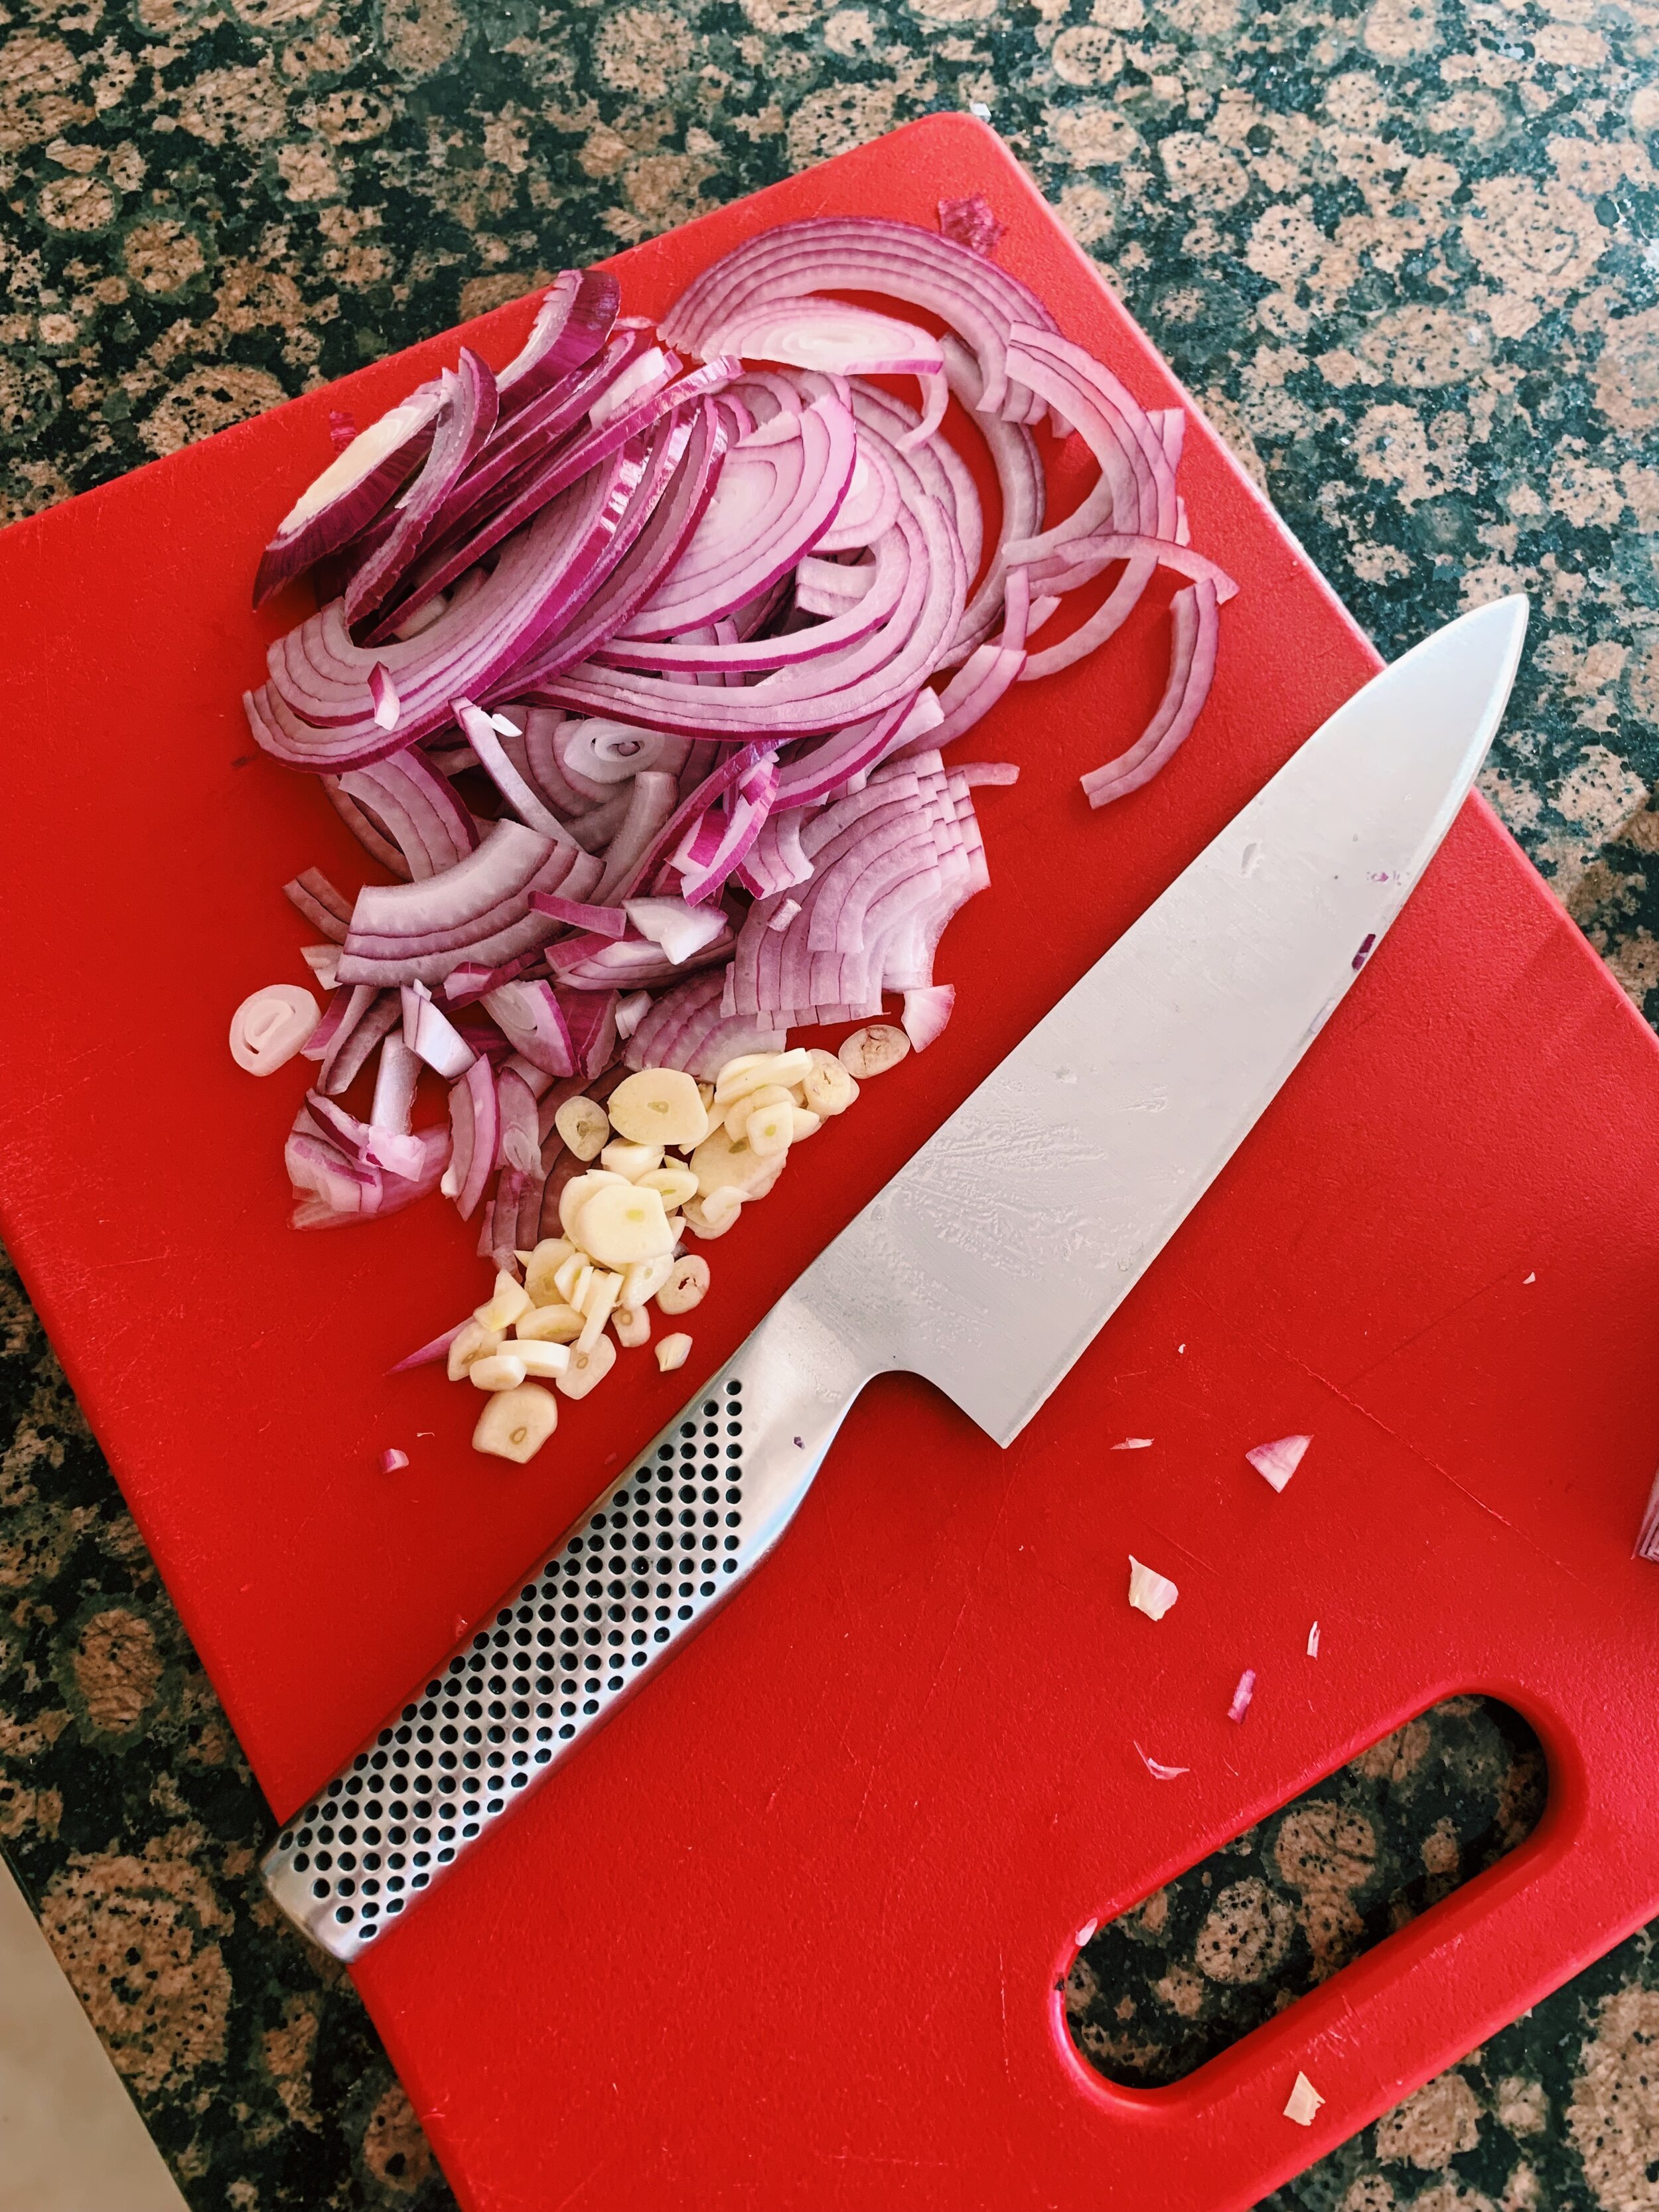
Toppings can make or break a dish. Good thing Alison’s suggestions make this dish a hundred times better: namely lime juice (use it liberally), fresh cilantro (sprinkle it freely), and thinly sliced red onions (enjoy). These three elements elevated the dish from being too heavily dominated by the coconut milk and chicken fat. I made the effort to chop up more for leftovers too – they’re that essential. For the record, Alison suggests fish sauce and peanuts as well, but I felt they were unnecessary. 

This dish is hands-down in my top three Alison-chicken dishes. It requires moderate effort and skill for such flavorful and filling results. Plus, I’m a huge fan of Indian and Korean flavors, so it’s no surprise that this dish won me over. The other top two are her Slow-Roasted Oregano Chicken with Buttered Tomatoes (no surprise there), and Crispy Chicken Legs with Rosemary, Tiny Potatoes, and Sour Cream. I also love when a dish makes enough for leftovers. Quick tip: before storing the rest in a container, try separating all of the chicken from the bones. It takes about ten minutes, but it makes eating leftovers effortless, and less messy. You’ll thank yourself later. 

140 recipes cooked, 85 to go.

Whole Roasted Snapper with Harissa and Sun Gold Tomatoes by Alison Roman

Rule #1: Don’t forget to ask the seafood counter person to gut and scale your fish for you. 

Rule #2: If you forget to ask, don’t be afraid to take the fish back to the store and ask the seafood counter person to gut and scale your fish for you. 

Rule #3: Gutting a fish is really gross. 

You’ve probably surmised my fish journey by this point. Yes, I assumed the seafood counter person had gutted and scaled my fish. They only scaled it. Turns out seafood counter people agree that gutting a fish is gross and they won’t do it without being asked. Can I blame them? No. But learn from my mistakes. And yes, you can bring your fish back to the store and they’ll gut it if you ask. 

Before Jordan, my dear husband, started his new job last week, he had time on his hands. As I was commuting home from my own new job, I thought to put his free time to good use. Why not have him drive a fish to Whole Foods to be gutted, and have him make Alison’s whole roasted snapper recipe for me? So that’s exactly what he did. 

He tells me the whole preparation and cooking process was easy. “Are all of Alison’s recipes this simple?” All he had to do was combine garlic and harissa with some olive oil, and use that mixture to coat the fish and cherry tomatoes. He stuck them all in the oven, and voila! Meal ready. We served the fish with salad and brown rice. 

We both decided that snapper isn’t our favorite fish. The flavor is too… fishy. The texture, a little too game-y. We far prefer branzino or salmon. Jordan found this especially disappointing because he wants to be able to say “I love eating snapper.” “That’s a cool thing to say, isn’t it?” We’ll have to score our cool points elsewhere. 

139 recipes cooked, 86 to go.

check out those jammy tomatoes

check out those jammy tomatoes

Split Pea Salad by Alison Roman

For a long time, actually my whole life, I thought split peas were simply green peas split down the middle. Sometimes things are allowed to be that simple, right? Turns out, I was sort of right. Split peas are green peas that have been peeled, dried, and then split down the middle. Split peas are grown and harvested differently than regular green peas, in a manner conducive to their drying and splitting. Personally, seems like a lot of effort to go into for some subpar grains (they don’t begin to compare to lentils or beans). And, other than split pea soup, does anyone use these split little guys in their regular cooking? I have doubts!

Alas, Alison has found a way to incorporate these oft forgone grains in a delicious salad that’s perfect for packing in school lunches and bringing to barbeques. Honestly, I’m here for it. 

I started by preparing the split peas. They needed roughly 30 minutes in boiling water to soften. I expected their bite to have a tiny mealy center, much like a lentil, but I don’t think that can be achieved without over-cooking them and letting them fall apart into a great green mush. If you want them to maintain their shape, expect their bite to resemble a slightly undercooked lentil. I combined the drained split peas with regular peas (I used frozen and thawed ones). Instead of letting my peas thaw over time on the counter, I stuck them in cold water, and they thawed within a matter of minutes. 

Next, I cooked some bacon low and slow. Ten minutes over medium heat was enough time for the bacon to render lots of fat and still get crispy, just the way Jordan likes it. The bacon fat became my cooking fat for the potatoes, which were baby dutch potatoes, quartered, and sprinkled with salt and pepper. Fifteen or so minutes over medium heat was all it took for the potatoes to turn a golden, crispy brown. The trick is to avoid stirring them too much.

Before tossing the potatoes with the peas and bacon, I poured mustard and red wine vinegar in with the potatoes and coated them in the acidic liquids. The whole skillet -- potatoes, cooking fat and all, get tossed with the peas and bacon and create a wonderfully flavorful salad. Topped with fresh chives, this salad is better than any salad you’ll find at a deli counter. It can be served cold or hot, either is delicious. 

I’ve been eating this for lunch all week, and I’ve yet to grow tired of it. 

138 recipes cooked, 87 to go.

Grilled Squid with Spicy, Garlicky White Beans and Vinegared Tomatoes by Alison Roman

I had a dream. That I’d cook all ten of Alison’s recipes intending for grilling with an actual grill. I got so close -- I made it to eight out of ten. Until recently, we lived a short drive away from my in-law’s who graciously let me use their grill for these recipes. I fed them great food, so why wouldn’t they? Then, three weeks ago now, we moved to Chicago. A city I love with all my heart, though it lacks many of the people I love in it. And once again, I’ve found myself grill-less. The last two grilling recipes -- this squid and the shrimp I posted over the weekend -- had to be cooked in a skillet on my stove, which, though a fine substitute, did not deliver the same flavor or texture that a grill could accomplish. If you make either of these recipes, do yourself a favor and find a grill. Even if that means a community grill at your local park. But bring a grill pan. Shrimp and squid will most definitely fall through the cracks! 

The flavors in this dish are right up my alley -- vinegary, a tinge of spicy heat, and the right balance of acid and creaminess between the tomatoes and beans. I got home from my commute around 6:10pm, and we were ready to eat by 6:40pm! This is a quick, satisfying, don’t-need-another-side-dish, kind of meal that’s perfect for a summer night after work. 

One of the very first recipes I cooked for this blog was Alison’s Spicy Garlicky White Beans. That was eight months ago now, and I had forgotten how simple they are! You can read all about them in the link above. I started the beans first before moving onto the squid. 

Want to know about my prep process for squid? Read about it here. Essentially, if you’re going to use a skillet instead of a grill, the tubes should be cut into half inch pieces, and the tentacles cut in half lengthwise prior to cooking. If you use a grill, Alison recommends cutting them after cooking, which makes sense. Squid shrinks quite fast, and it could prove challenging to keep them from falling into the grates.  

In her instructions for both grilling and sauteing, she tells us to look for the squid to turn a golden brown color. I’m not sure what she means. A very pale golden tint, maybe. But golden brown? Not only do I not see my shrimp turn that color, but the picture in her book doesn’t show squid that color either! So if you too don’t see that color appear, don’t be disheartened. Give it the six to eight minutes she instructs, and then move on. 

While sauteing the shrimp in batches till “golden brown,” I sliced the tomatoes. I couldn’t find heirloom tomatoes at my TJ’s, so I used organic tomatoes on the vine instead. They were delicious. (Do your best to find tomatoes that won’t be mealy or watery. That will honestly ruin the dish.) Then I covered them in red wine vinegar, and topped them with the beans and squid.

Like I said, Jordan and I ate this as our only dish for dinner, and nearly finished the whole plate. The tomatoes paired perfectly with the beans (which pack quite the heat!), and the salty squid added the right balance of protein and chewiness. 

137 recipes cooked, 88 to go.

Grilled Shrimp with Crushed Fresh Tomatoes and Lots of Lime by Alison Roman

Shrimp just doesn’t do it for me. That’s what I decided after making this recipe. Don’t get me wrong - the flavors were awesome, and the whole thing was very simple to make. If you like shrimp, you’ll love this dish. But no matter the flavors, shrimp’s chewy texture and less than appealing shape will always be roadblocks for me. I just had to put that out there. 

new Chicago kitchen!

new Chicago kitchen!

But let’s move on to the recipe itself. Because again, shrimp lovers should definitely make this one. 

It starts with the crushing of a large tomato in your hands. Enjoy it -- this may be the only truly playful moment of your day. Let your hands squeeze every last bit of tomato pulp until no large chunks are left. Then mix in four grated garlic cloves, salt, and pepper. 

Next, shrimp in their shells (my first time buying shelled shrimp!) spend time in a large skillet. Only a few minutes, though. Shrimp cooks quickly! The recipe gives options for a grill and a skillet, but I am sadly grill-less once more. Piping hot and opaque, the cooked shrimp get tossed with crushed tomatoes, and doused with lime juice. And don’t forget, 2 tablespoons of butter get added, too. The steam from the shrimp melt the butter, adding a necessary richness to offset the thinness of the tomato juices. 

I served the shrimp over rice with roasted carrots. It was a lovely meal, but with Jordan and I not loving shrimp, we didn’t finish it, and sadly, chose not to save the leftovers. I hate few things more than wasting food. And I also know myself. I know that that leftover shrimp will never get eaten. So we let it go right away. 

Ultimately, butter, tomato, garlic, and lime juice are good friends. Let them dress your shrimp, your squid, your fish, your tortilla chips. Trust in their friendship, no matter what you pair them with. 

136 recipes cooked, 94 to go.